
Whether you are canyoning or bushwalking, the ability to make an emergency harness using tubular tape could get you out of some pretty sticky situations. Below are four techniques for making a simple, secure harness using just a few metres of tape.
As well as being useful in an emergency, T2 has deliberately used some of these on canyoning trips (generally when he has given out all his harnesses to beginners) and says they perform surprisingly well. He also carries a tape harness, a carabiner and 20m of 6mm rope when doing off-track or exploratory bushwalking trips to provide an emergency abseil / top belay option.
These harnesses can be used either with a descender, or simply by tying a munter hitch (which works best when abseiling on single ropes, but is possible to do with double ropes). A munter hitch is also an easy way to rig a top belay when you don’t have a belay device with you.
Option one: The quick-fit field harness
This is probably the most comfortable tape harness I have tried. I discovered it in On Rope, by Smith and Padgett. This design has the benefit of fitting a range of sizes without adjustment, which comes in handy in many circumstances.
Step 1: Start by tying approximately 2.5 metres of tape into a sling using a water knot.
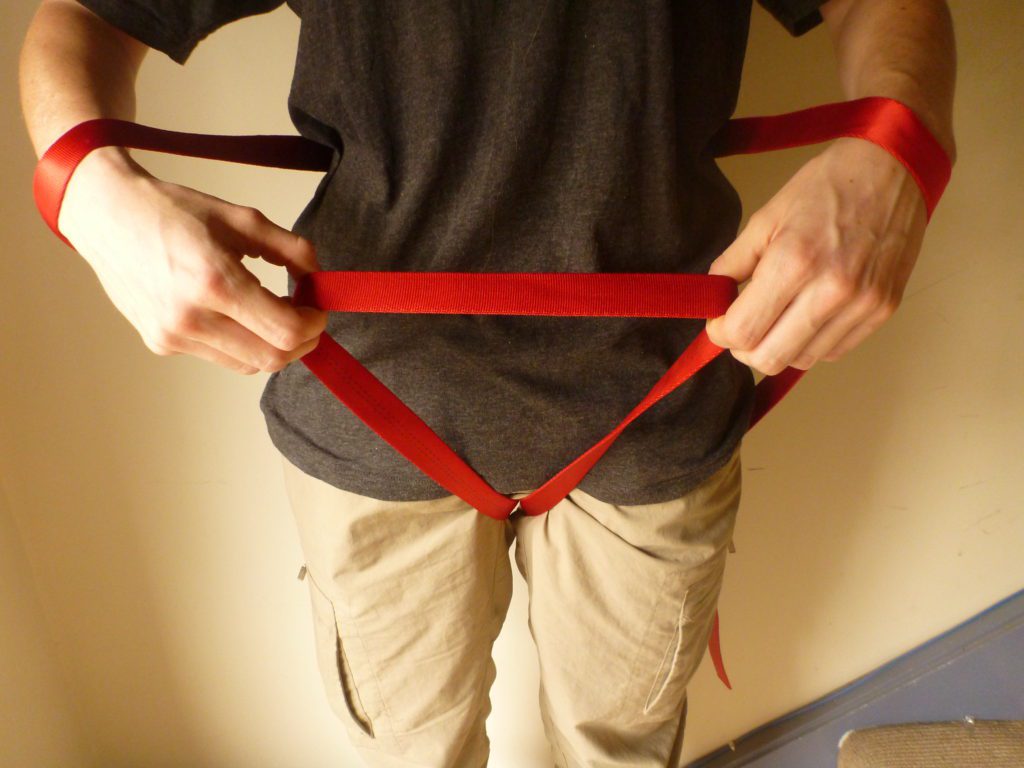
Step 2: Wrap the sling behind your back, with the top strand on your waist and the lower strand below your bum. Have the top strand of the sling run over each of your wrists.
Step 3: Reach between your legs and grab the lower strand with both hands (as shown in the picture below).
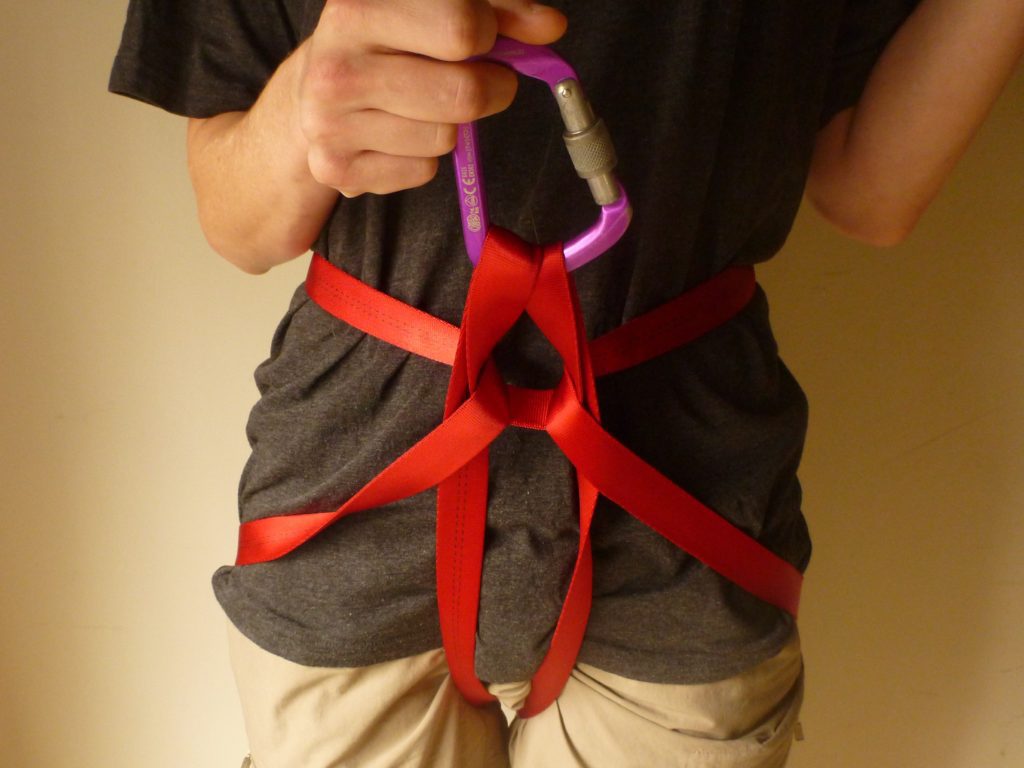
Step 4: Take the loop that is being held with each hand and pull it back through the waist loop that had been resting on your wrists.

Step 5: Attach a locking carabiner through the two loops produced in the previous step.
Option two: Bjorn’s variant on a basic tape harness
This design is comfortable and stays up when off rope.
Step 1: Like the first design, this option requires you to create a sling using a water knot. Ensure you leave tails that — in total — are slightly longer than your waist circumference. (For this design you will need to adjust the length of the sling to the correct fit, requiring some trial and error. During the process of finding the right length, simply tie a temporary overhand knot. Once you have found the correct length, remove the harness and retie this using a water knot.)
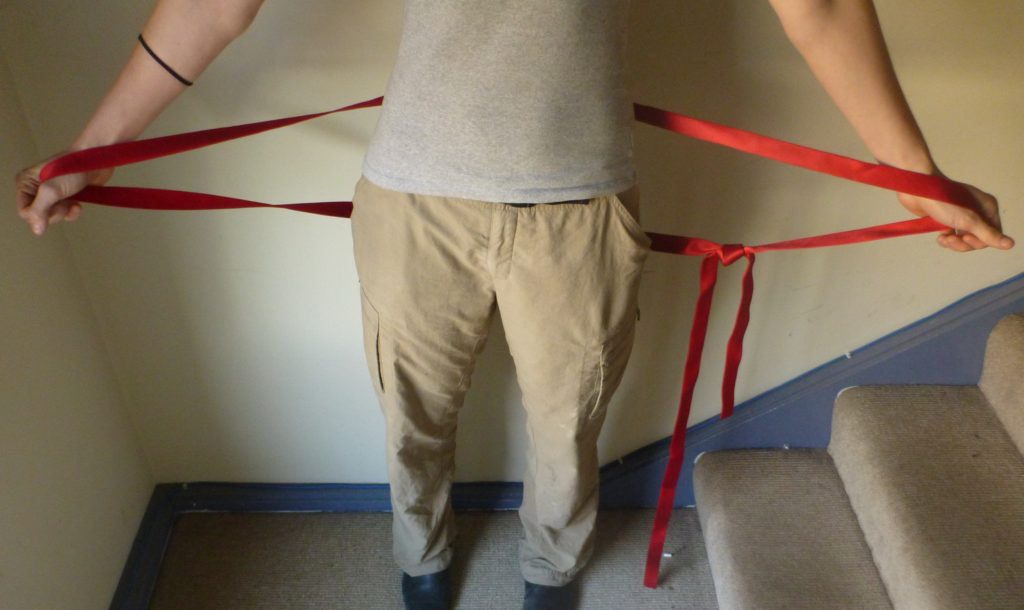
Step 2: Place the sling behind your back, with the top strand on your waist and the lower strand just below your bum, with your hands holding a loop out on each side.
Step 3: Bring the loops in both hands together in front of you.

Step 4: Reach between your legs and bring the bottom strand of the sling from behind. Take it above the two side loops you were already holding to your front. Pull the side loops through and up so they are now holding the bottom strand in place.

Step 5: Attach a carabiner between the two side loops.
Step 6: Wrap the long tails around your waist and through the side loops. Tie the tails using an overhand knot at a comfortable tightness. This loop will hold the harness up when you are off rope.
Step 7: Ensure you retie your temporary knot from step one with a water knot to ensure the harness is secure.

Option three: T2’s simple tape harness
Step 1: Take about 3 metres of tape (depending on the size of the people who will be using it) and tie it into a sling using a water knot.
Step 2: Pass the sling behind your back, with the top strand above your hips and the lower strand below your buttocks.

Step 3: Bring the loops in each hand together in front of your body.

Step 4: Holding the two loops in front of you, reach between your legs and pull the lower strand through to form a third loop.

Step 5: Use a carabiner to clip the three loops together.

Option four: T2’s variation on the mountaineer tape harness
The next option is T2’s preferred technique (he claims angels brought the design to him in a dream, although it is remarkably similar to the Mountaineer Tape Harness described by Smith and Padgett). It provides a slightly higher anchor point on your body, which makes abseiling easier, and feels more secure on your legs. It requires slightly more tape than the simple options above to allow for the additional knots.
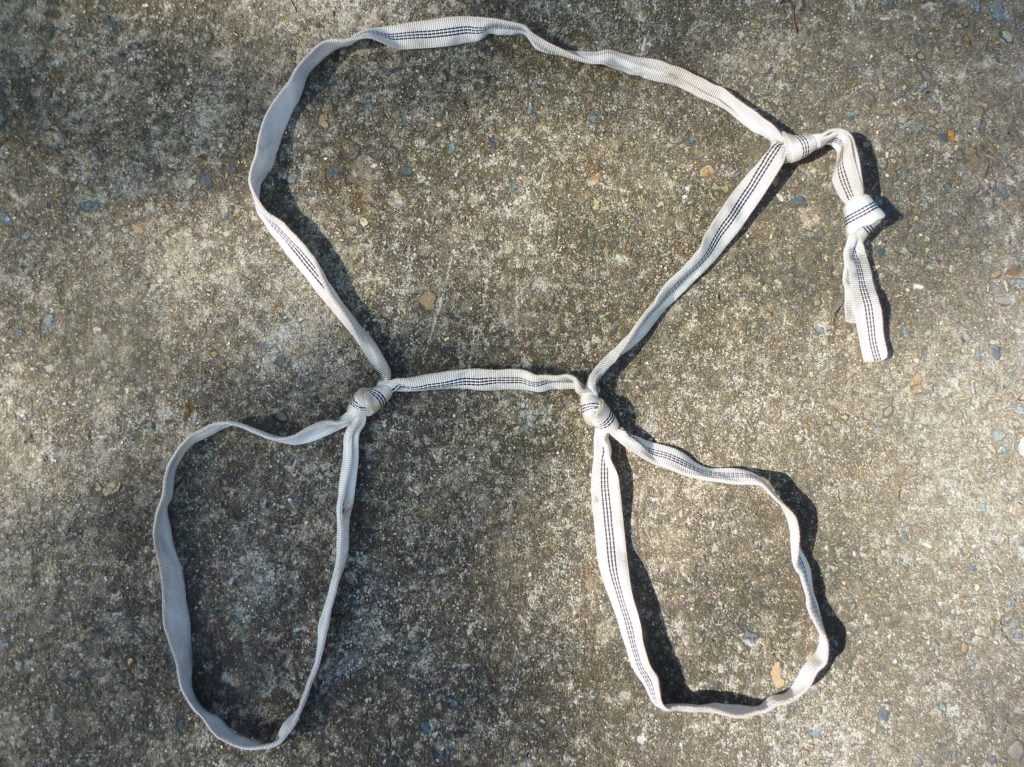
Step 1: Starting at one end of the tape, move along it about 50cms. From this point, make your first leg loop (ensure it is small enough to fit snugly, but large enough to fit over clothing / wetsuits, remembering that he knot will use up some of the tape). Tie this loop off using an overhand knot.
Step 2: Move another 20cms along the tape, then make a second leg loop (as close in size to the original loop as possible). Again, tie it off using an overhand knot.
Step 3: From this loop, take enough tape to continue around your back and tie off to the other end with a water knot. Aim to have at least 20cm tails on the knot for added safety (which can be tied together with an overhand knot to create a gear loop).
Step 4: Put the harness on by placing both your legs through the big loop, then through their relevant leg loops. Pull the harness up so that the big loop rests above your hips.
Step 5: Clip a carabiner through the two strands that run over your hips and join the leg loops. Then clip the strand between the two leg loops into the carabiner as well. Once clipped together the harness should fit snugly and remain in place while walking. If it is too tight or loose you will need to adjust the water knot that joins the two ends.

this needs a video…
what keeps the bottom loop secure? (the loop that was pulled from under and behind?)
what keeps it from pulling off the biner when no climb line is attached?
thanks
newb here
You Fat Canyoners must be thinner than you look. I am a size 10 Female, and that 2.5m of tape is nowhere near long enough for me to make an emergency harness. Haha!
Bjorn has always been in pretty good shape. I’m sure if I was making it I’d need at least 3m!
So, if you’ve prepared a loop and it’s too large for option three, you pull the middle through the sides and end up with option one. Nice.